Linux VPN Installation Instructions
Due to changes with authentication (notably multi-factor authentication), access to VPN with Linux can be a challenge. As a result, these instructions list a few different options for accessing TRIUMF's network remotely.
OpenConnect
Recent releases of OpenConnect have added support for HOTP and TOTP MFA methods and can work with TRIUMF's VPN. If you have access to OpenConnect version 9 or greater, you're encoraged to use it to connect to VPN.
Note that the newer MFA "number matching" method released for Microsoft Authenticator where you verify yourself by entering digits from your computer screen onto your phone won't work with OpenConnect. This is because OpenConnect doesn't open a viewable browser window for you to authenticate during its login process. The best MFA solution for VPN access is to configure an "other" Authentication App authentication method. Using this method, Microsoft will fall-back to the time-based one-time password authentication method which can be provided to OpenConnect during login.
Using this method means that you will select TOTP in the appropriate configuration menu during your initial VPN connection setup.
Installation
Below is some information on how to install OpenConnect on various distributions and how to configure your connection through some standard methods. These instructions will provide instructions using the command-line since it's easiest to copy and paste from these instructions. If you prefer to use a software manager that comes with your desktop environment, you should be able to just use the same package names as those listed in the instructions with your software manager of choice.
These instructions also assume that you can escalate privileges through sudo. If sudo is unavailable to you, you'll need to login to your root account via
some other method. Eg. by typing su - and entering the root password.
RHEL 9+ (including CentOS 9+, Alma Linux 9+, Rocky Linux 9+, Fedora 36+)
Make sure you have the EPEL Repository installed (not applicable for Fedora):
$ sudo dnf install epel-release
Install the OpenConnect software:
$ sudo dnf install openconnect NetworkManager-openconnect
(Optional) Install additional packages for customization / user interface features:
$ sudo dnf install NetworkManager-openconnect-gnome  # NetworkManager Gnome Settings integration for configuration in your Desktop interface
$ sudo dnf install network-manager-applet            # "nm-applet" toolbar item for managing network connectivity, including VPN
$ sudo dnf install vpnc-script                       # Additional scripts for things like host checkers
Debian 12+ (including Ubuntu 21+, Mint 19+)
Install OpenConnect
$ sudo apt-get update && sudo apt-get install openconnect network-manager-openconnect
(Optional) Install additional packages for customization / user interface features:
$ sudo apt-get install network-manager-openconnect-gnome   # NetworkManager Gnome Settings integration for configuration in your Desktop interface
$ sudo apt-get install network-manager-gnome               # Includes "nm-applet" toolbar item for managing network connectivity, including VPN
$ sudo apt-get install vpnc-scripts                        # Additional scripts for things like host checkers
Arch Linux
Install OpenConnect
$ sudo pacman -S openconnect networkmanager-openconnect
(Optional) Install additional packages for customization / user interface features:
$ sudo pacman -S network-manager-applet # Includes "nm-applet" toolbar item for managing network connectivity, including VPN
Configuration
There are few different ways to configure your VPN connection. The options below represent the most common methods of configuring your VPN connection.
GNOME NetworkManager Configuration
If you're able to access your Network Configuration through the Gnome system configuration interface, you can follow these steps:
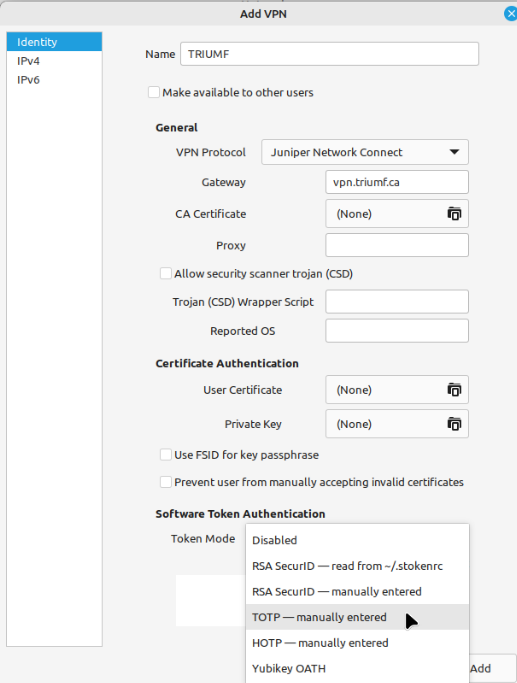
Open the GNOME System Settings Window and scroll down to the "Network" icon.
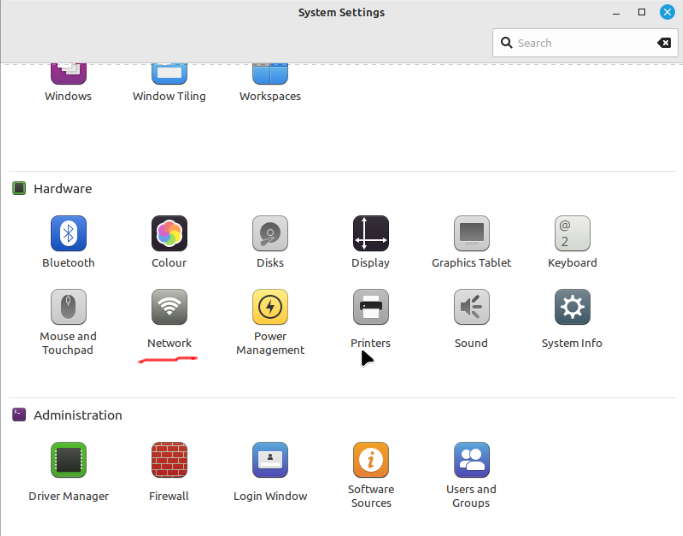
On the Network Screen, click the + icon to add the TRIUMF VPN Connection
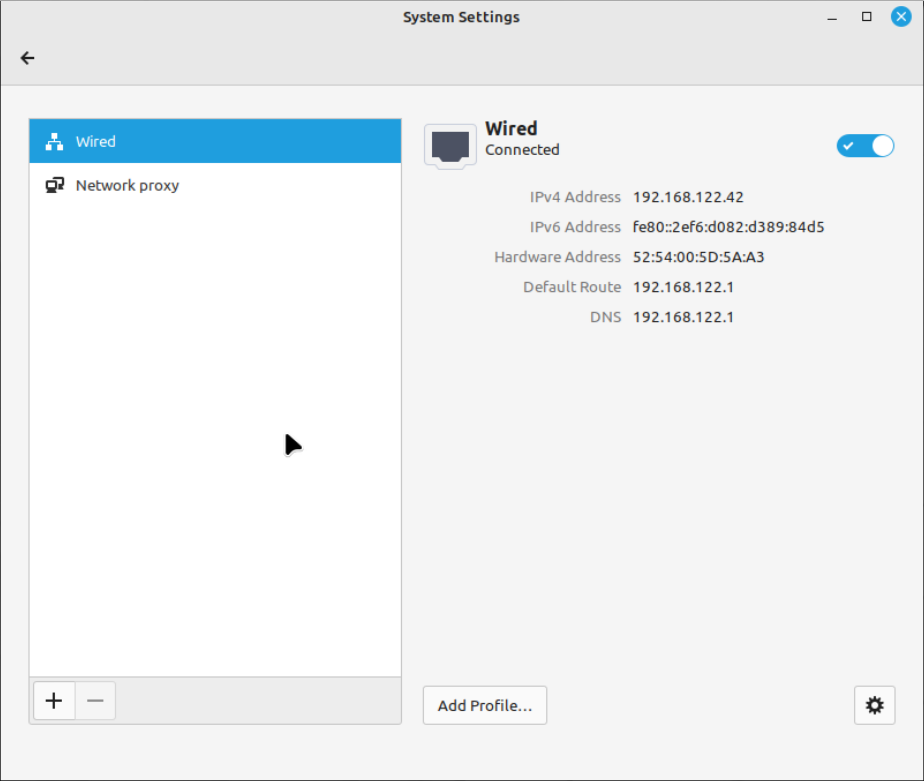
If you've installed the required OpenConnect packages, you'll be provided with the option to use OpenConnect for your VPN connection. In this example
the OpenConnect option is labelled the Multi-protocol VPN Client. The label may be slightly different on your system, but there should be some mention
of openconnect.
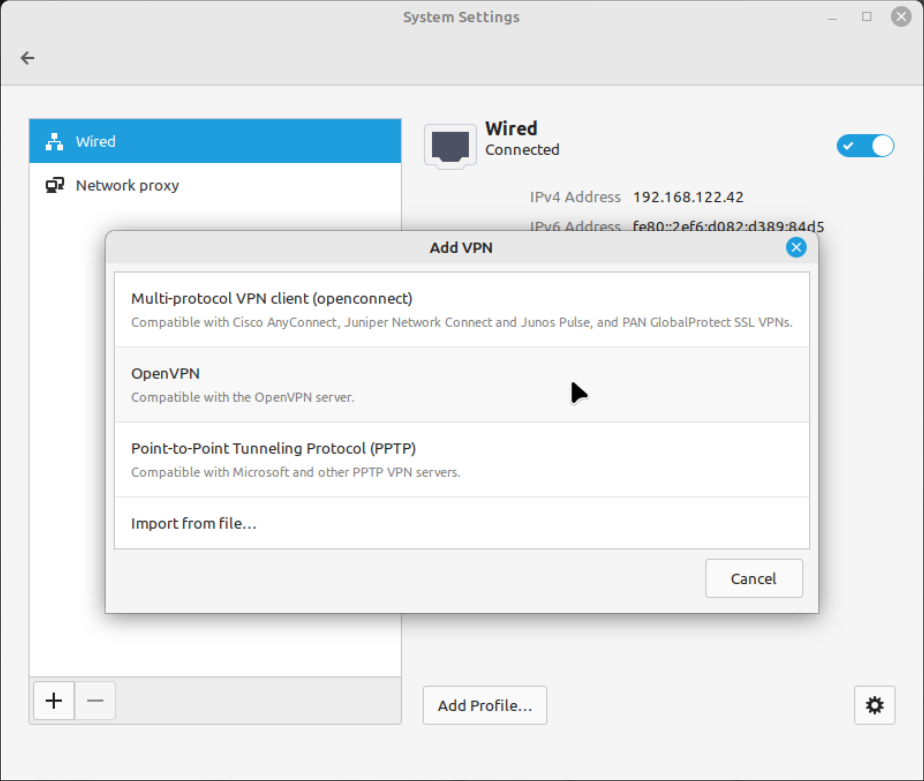
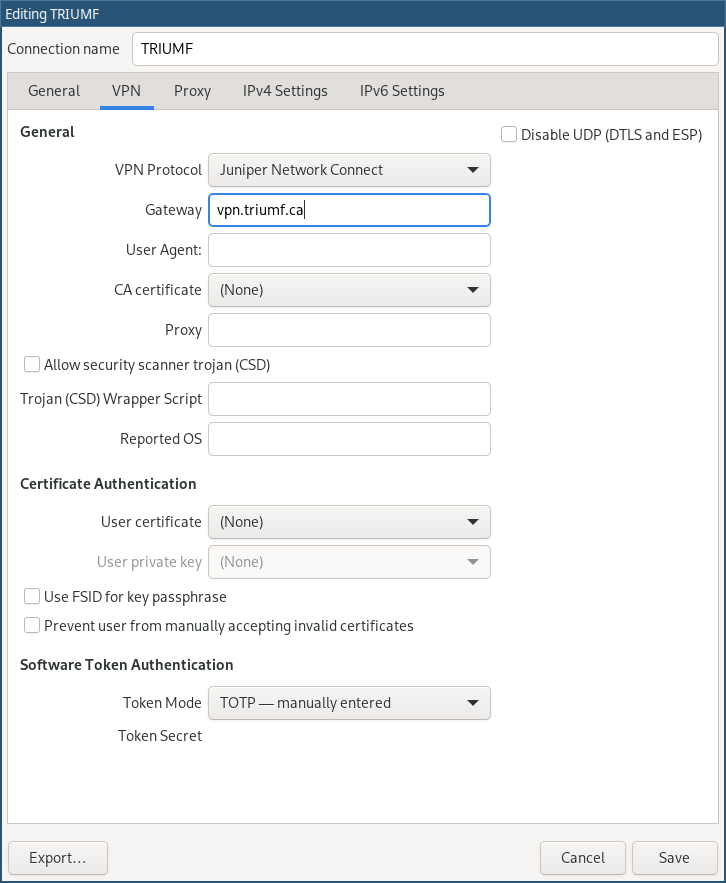
Configure OpenConnect to connect to TRIUMF VPN. On this window you should select:
- Make available to other users: Checked
- VPN Protocol: Juniper Network Connect
- Gateway: vpn.triumf.ca
- Token Mode: TOTP
Finally, test a connection to TRIUMF VPN. Make sure your username is your full email address and supply your TRWIN password.
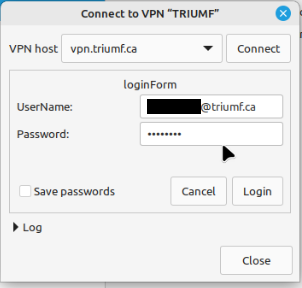
Once your username and password have been supplied, you should be prompted for your multi-factor authentication one-time password. Provide that when prompted and continue by clicking "Login" again.
Notes:
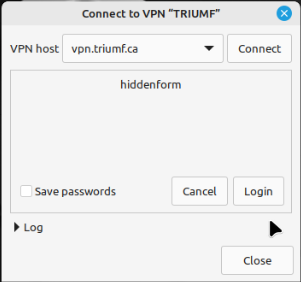
On some setups, you may need to repeat a click on the "Login" button after supplying credentials and your one-time password. It's unclear why this is needed, but the login seems to continue successfully after the extra clicks are added. If you need to repeat the login click, your login dialog will unblur the login button and the credentials field should be blank and simply say "loginForm" or "hiddenForm".
Eg.
nm-applet (Network Manager Applet)
This option usually appears in your task menu and will look similar to:
![]() or
or ![]()
If nm-applet is available to you, you can configure your TRIUMF VPN connection by clicking on it, selecting "VPN Connections" -> "Add a VPN connection":
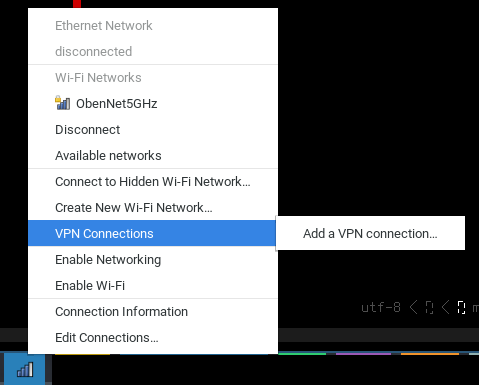
Once you've selected to add a VPN connection, the steps are similar to the GNOME Network Manager steps above. First, select the Juniper Open Connect option:
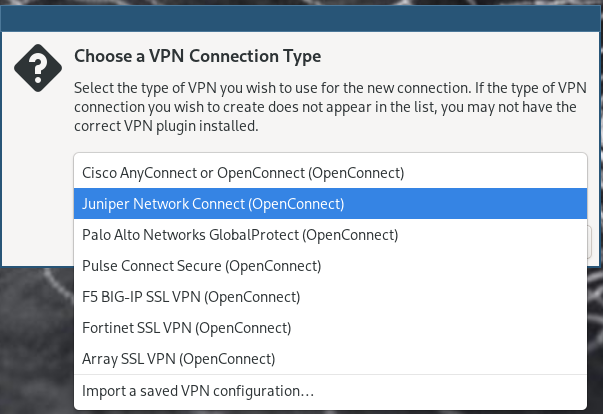
On the next page fill out the relevant values for gateway and your desired MFA OTP option:
Once you've created your VPN connection, you should find the VPN option under the "VPN Connections" section in nm-applet. Click on it and you should be able to proceed through the login process as is described in the GNOME section.
